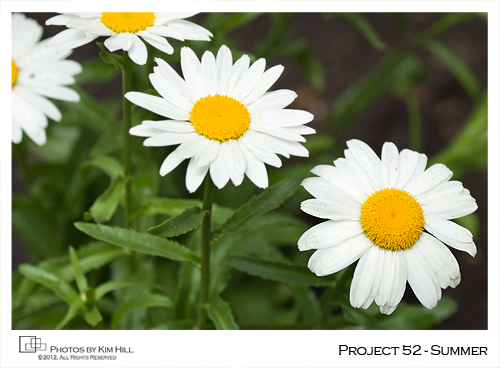
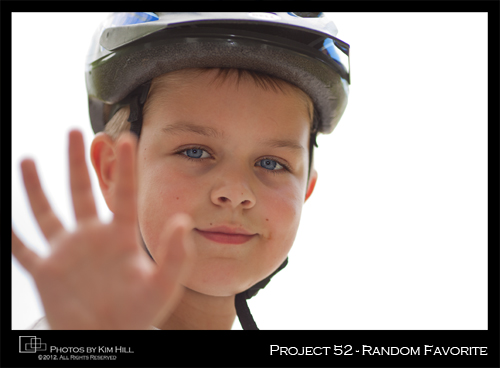
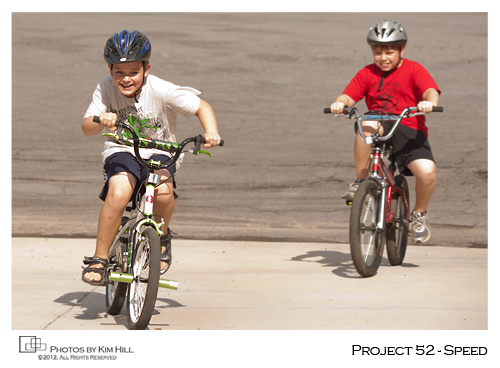
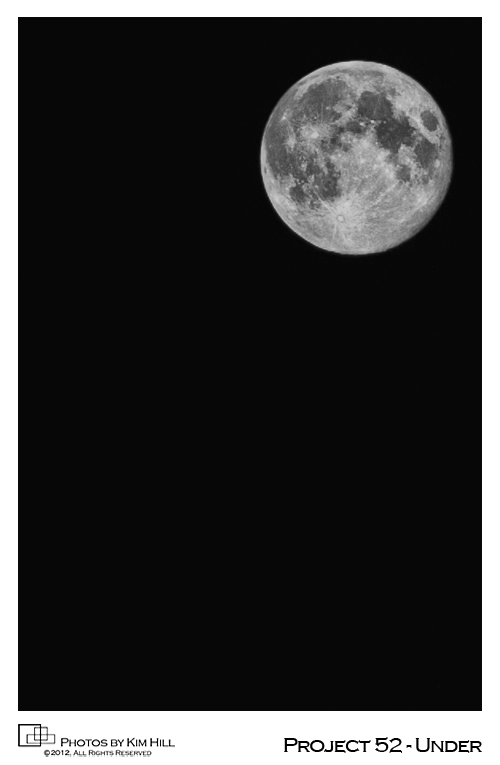
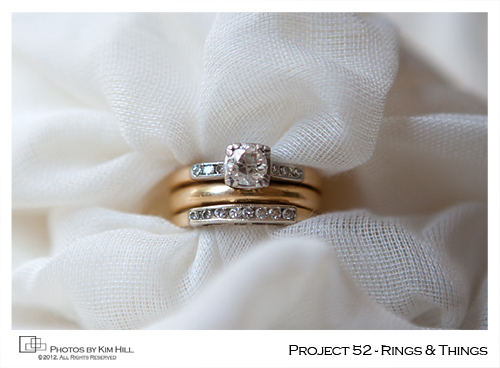
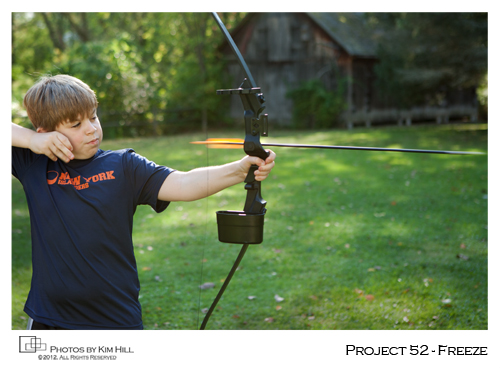
Project 52, Weeks 33-39 {Personal Photography Project}

Wow, got a bit behind in posting my Project 52 images.  Summer seemed to just slip away from me and before I realized it I was 7 posts behind.  So here is a super quick catch-up.

Summer shot details:  Canon 135L, handheld, ISO 100, F4.5 at 1/400th

Random Favorite shot details:  Canon 135L, handheld, OCF, ISO 50, F2 at 1/250th

Speed shot details:  Canon 135L, handheld, ISO 50, F5, 1/250th

Under shot details:  Canon 70-200L at 200mm mounted on tripod, ISO 100, F5, 1/320th

Rings & Things shot details: Canon 24-70L at 66mm, handheld, ISO 200, F2.8 at 1/200th

Freeze shot details: Canon 24-70L, handheld, ISO 200, F3.2 at 1/200th

Fall shot details: Canon 24-70L at 54mm, handheld, ISO 200, F3.2 at 1/100th

Are you doing your own Project 52 or Project 365/66?  If so, please post a link to your images in the comments below.   🙂

Button-Portfolio  Button-FB-Fans  Button-Twitter  Button-BookSession


Posted in Project 52 | Tagged , , , , , , , , | 1 Comment

Boudoir portrait session {Cicero NY boudoir photographer}

A few weeks ago, I attended a 50 Shades of Gray ladies night out event hosted by a local library and a local restaurant.  When I initially received the request to attend as a vendor, I thought “pretty progressive library!!”.  LOL   I was able to set up a small display and met with a lot of great women, one of whom is featured in this post today.

This beautiful, middle-aged mom of three came to me wanting tasteful boudoir images to give as a gift to her boyfriend.  She told me she was at a good point in her life, felt great about herself and her body, and wanted to capture this moment not only for him, but for herself as well.  The one thing I found rather amusing was that when she made her initial inquiry she stated she just wanted “one or two shots, that’s it”.  I told her that nobody ever leaves here with just one or two shots, and I was pretty sure she would be no different.  Well I’m thrilled to say she was quite pleased with her images – choosing 17 favorites which she had a challenging task of narrowing down.  See….I knew she wouldn’t leave with just one or two.  This type of photo session is usually a once in a lifetime experience – sure, I have a few repeat clients, but it’s far more common for women to splurge on themselves just once.  So why wouldn’t you want to take full advantage and choose as many of the images as you truly love, right?

I would love to share a bunch of photos from this boudoir portrait session with you but, due to the nature of her profession, we decided it was best to choose just this one in order to keep her identity private.  This one shot is so beautiful and it really sums up the session well.

Are you interested in having your own boudoir portraits taken?  Click the “book a session” image below and we’ll get you on the calendar. 🙂


Posted in Boudoir | Tagged , , , , , , , , , , | 9 Comments

Choosing the right size portrait for your wall {Cicero Portrait Photographer}

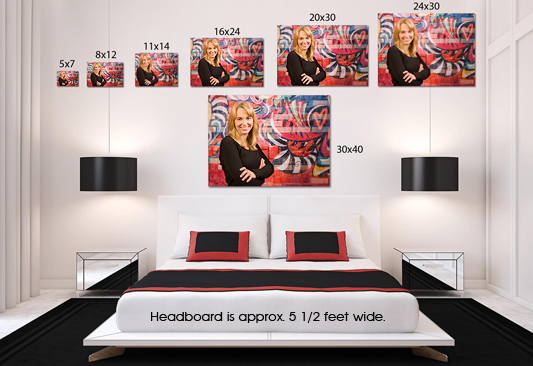
All too often, I hear people say they are afraid to “go big” with their wall portraits.  “I’ll just take an 8×10” or “11×14 is huge”, are common statements made when we are discussing what size to choose for their walls.  Print sizes starting at 11×14 are actually the traditional wall portrait sizes.  Anything smaller would be a desk print.  Unless you are creating a wall cluster of several images, I really do believe that one large focal piece is sure to add that WOW factor to your home or office decor.  This could be a spot over your fireplace mantle, over your bed, or even the traditional spot over the couch in your living room.  Here are some image samples to show you the difference between the various sizes:

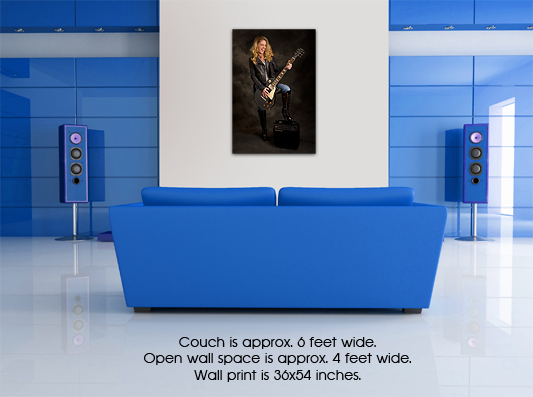
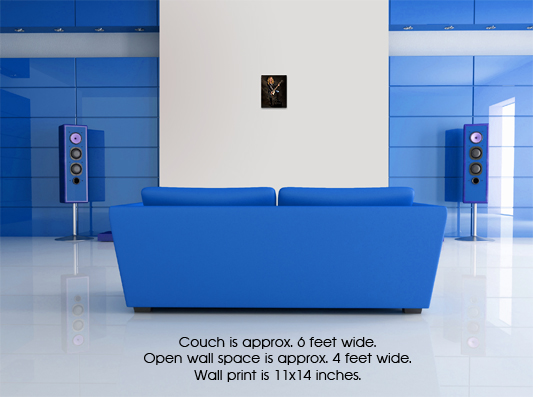
So how do we determine what size is best for your space?  I recommend measuring the furniture piece that sits along the wall you want to hang the portrait.  Then divide that number in 1/2 (or up to 2/3) to determine the width of your portrait.  In the example below, the couch measures about 6 feet across.  Half of that would be 36 inches.  So you could hang a portrait vertically that is 36 inches wide by 54 inches tall here, as I’ve shown, or you could hang a portrait horizontally that is 36 inches wide by 24 inches tall.  If you wanted to hang a grouping of images together, then I would recommend making them smaller so that the total width of all portraits together is 36 to 44 inches across.

With this same room shown below, you can see that hanging an 11×14 is much too small.  The wall dwarfs the portrait, making it seem even smaller than it already is.

I’d also suggest hanging the portrait so that the center of the image is about 5 1/2 feet up from the floor as this is a comfortable viewing level for most people. The only time I think I’d recommend differently is if the furniture or fireplace mantle height is at 5 1/2 feet already.  In those cases, place the bottom edge of the portrait about 3 to 5 inches above that.

Still unsure what would work best in your home?  No problem!  I offer in-home service and will measure the space for you, make suggestions on which portraits from your session suit the space best, and will gladly create wall grouping designs should you decide you want to showcase several images together.  Contact me to set up your appointment today.

Button-Portfolio  Button-FB-Fans  Button-Twitter  Button-BookSession


Posted in Photo Products, Photography - General | Tagged , , , , , , , | 12 Comments

Preparing for your senior portrait session {Syracuse senior portrait photographer, Kim Hill}

With senior portrait season now in full swing, it’s time to think about what you need to do to prepare for your session. Trust me…doing these things will pay off in the end. 🙂
1 WEEK BEFORE:

(a) Get your hair trimmed, but don’t go crazy and try out a totally new hairstyle. Dark roots photograph horribly, so I suggest you get a touch up if necessary. While at the salon, have your brows waxed. Girls – shave your legs and underarms. Guys – shave the morning of unless you want a scruffy look.

(b) Moisturize your skin – hands, arms, legs, face are most important as these will show in the photographs. Routinely using moisturizer will keep your skin looking healthy so if you can start doing this several weeks before your session it would be great!

(c) Limit sun exposure prior to your portrait session avoiding sunburns or tan lines. Tanning beds/booths are NOT recommended either as the camera picks up the “orange” tone and it is not easily remedied with post-session editing.

(d) Begin choosing your outfits and props. A great way to add variety to your session is through your wardrobe. I always recommend laying out your clothing as a complete outfit from head to toe meaning shoes, top, pants, jacket, jewelry, sunglasses, hat and/or hair accessories, as well as props. The reason for this is because we will shoot several different looks – full length, 3/4 and headshots. A few tips for choosing outfits:

– do your choices vary in color and will they look good with the backdrops you selected?
– do your choices vary in season (some short sleeve, some long sleeve)?
– does anything you selected have an interesting texture?
– can you wear this to church or other dressier occasion?
– can you layer this with a jacket or scarf?
– something classic and timeless for the yearbook – consider bringing family heirloom jewelry pieces for a few shots.

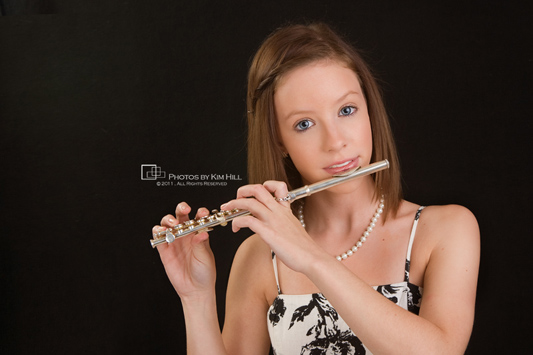
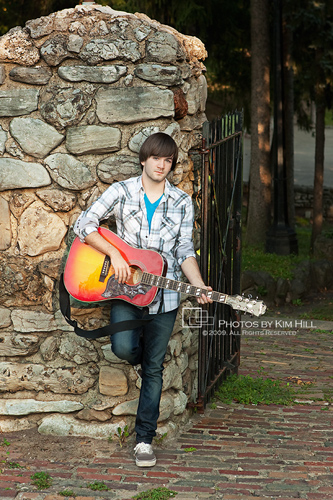
It’s okay to bring a garment bag full of outfits with you…most seniors do. Just try not to jam them all in a suitcase because they will end up wrinkled and I’d hate to waste your session time steaming the wrinkles out. Other things you can bring along that might be fun props include a smart phone, books you love, hat, class ring, sports uniform(s), musical instrument(s) and anything else that will show us who you are and what you like to do.
THE DAY BEFORE:

(a) Treat yourself to a manicure and pedicure, or at least do it yourself. Your fingers and toes WILL show and chipped polish is not cool. Also, try to choose a neutral nail color so that it is a classic, timeless look. Guys – you, too, would benefit from having your nails groomed.

(b) Get a good night’s rest. If you are up late, it will show in your images.

(c) Iron or steam your clothing so that it looks the best it possibly can. I do have a steamer here should you need it, but I’m sure you’d rather not waste your session time steaming out wrinkles.
YOUR SESSION DAY:

(a) Bring your hair tools and makeup for touch-ups. If you would like a more glamorous experience, consider scheduling our preferred makeup artist and hair stylist. There is an additional fee for each one and scheduling in advance is required.

(b) Plan to arrive 10 minutes before your session so that you have time to unpack your clothing, hair tools, props, shoes, etc.

(c) Eat before you come to the session, or bring a snack and a drink with you. The most popular session package lasts upwards of 2 hours and I want you to feel good the whole time you are here.

(d) Bring a few pairs of shoes, boots, etc. Different colors and heel heights would be awesome!  Same goes for the guys.

(e) Try not to be nervous. We will have fun and you’ll be laughing at me for sure!

(f) Feel free to bring a parent or a friend with you if you’d like the support. The studio is small so please limit this to just one person.
If you have any questions, you are more than welcome to email or give me a call during regular studio hours.  Your senior portrait session only happens once…let’s make it the best it can be.


Button-Portfolio  Button-FB-Fans  Button-Twitter  Button-BookSession


Posted in Photography - General, Senior Portraits | Tagged , , , , , , , , , , , , | 13 Comments

Project 52, Weeks 31 & 32 {Personal Photography Project}

Got a bit behind again in posting my Project 52 images.  Sorry about that.

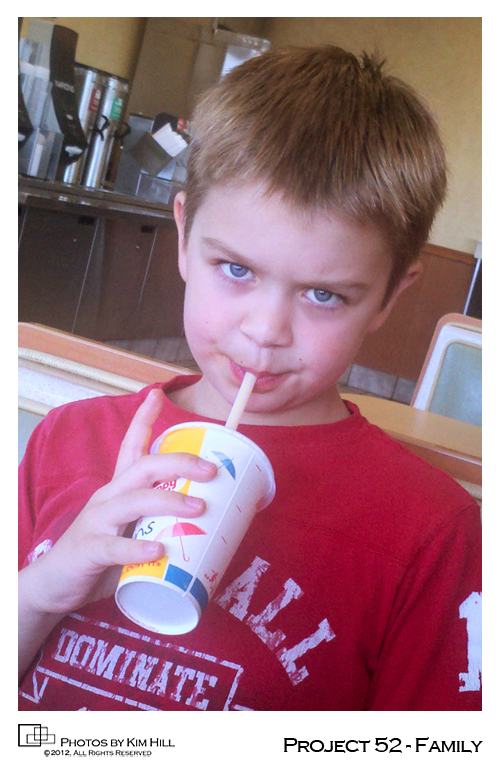
Week 31’s theme was “family”.  Once a week, the boys have swim lessons with one hour of free time in between – right at the dinner hour.  So rather than drive all the way back home to pound down a quick meal, we’ve been going out to dinner in between their lessons.  We’ve tried out a variety of different restaurants, but of course their favorite is McD’s.  Here is our youngest enjoying some lemonade and giving me the look of death…he obviously was not in the mood for pictures that day.  LOL  This was shot with my Droid 2 phone.  I’m still perplexed on how to explain the EXIF data.  All I can tell for certain is that it was ISO 200.  Based on the way the image looks, I’d guess the aperture to be around F11.  I edited this very quickly using Nik Color Efex 4.0 trial and reducing the opacity a smidge.

Project 52 Week 31: "Family" by Kim Hill


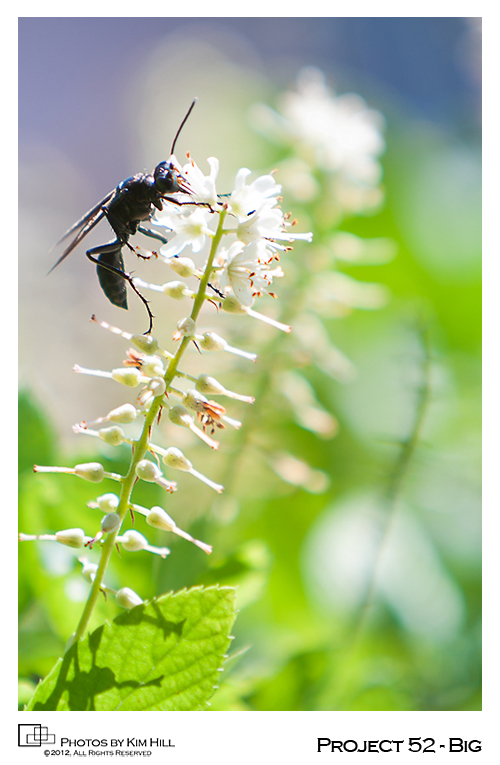
Week 32’s theme was “big” and I knew exactly what I wanted to capture for it…the great black wasp.  You’re probably shuddering at the thought right?!  Well, to be honest with you, so was I while standing out there trying to snag a shot without getting stung.  I have never seen these wasps before, not until this year when several of them took to our summer sweet bush along the corner of our garage.  These are HUGE – like 2 inches long.  And they flit around so fast that it’s really quite a task to try to get a photo.  This is the best of the bunch…and even this is not perfectly sharp in focus.  I do want to point out that it’s pretty cool that I was able to capture his “tongue”…none of the other shots had that.  For those interested in settings, I shot this with my Canon 70-200L handheld (first mistake) at ISO 50, F 2.8 at 1/400.  Next time, I’ll need to shoot at a higher F-stop to have a better chance at nailing focus.  Since the blossoms are now gone, I’ll have to just wait til next summer.

Project 52 Week 32:  "Big" by Kim Hill
Are you doing your own Project 52 or Project 365/66?  If so, please post a link to your images in the comments below.   🙂

Button-Portfolio  Button-FB-Fans  Button-Twitter  Button-BookSession


Posted in Family Photos, Photography - General, Project 52 | Tagged , , , | 7 Comments

Product Feature: Acrylic Wall Art {Cicero, NY Portrait Photographer}

Look what just arrived!!!  It’s the new, contemporary acrylic wall art that I’m adding to my product offerings.  This comes ready to hang in all the same sizes and prices as I already offer for canvas wall art.  Take a look:

Acrylic Wall Art by Kim Hill

The above photo really does not do this justice…you really must see it in person.  But I’m going to show you some of the details so you get a better idea of what this product actually is.  As you can see, I have flipped this upside down and the image is on the bottom, sandwiched between acrylic and a rigid mounting board.  The 1/2 inch thick wood standout keeps the art away from the wall a little bit and the wire hanger is already in place making this ready to hang.  Just decide where to put it, tap a nail in the wall, and hang it up.  Easy peasy.

Acrylic Wall Art Details by Kim Hill

Here is a closer look at the heavy duty wire hanger:

Acrylic Wall Art wire hanger by Kim Hill

And here is the backside:

Acrylic Wall Art backside by Kim Hill

If you love the look of clean lines and no frame, this product may be just the thing for you to decorate your home and office walls.  Be sure to ask me about it when you come in for your consult or even at your session.  I’d love to show you how gorgeous it really is.

Button-Portfolio  Button-FB-Fans  Button-Twitter  Button-BookSession

Posted in Photo Products, Photography - General | Tagged , , , , , , , , , , | 7 Comments

The World Open Photography Contest

If you are a regular reader of my blog or follow me on Twitter or Facebook, you probably know about The World Open photography contest that I entered back in early January.  I collaborated with a local model and makeup artist to create The Ice Queen image and paid a fee (not huge – about $16 I think) to enter the contest shortly after the photo shoot.

The Ice Queen by Kim Hill

The idea of the contest was to open up public voting which would then count towards 50% of the final vote – the other 50% would be done by a panel of judges.  The original deadline date was March 31, 2012 and contestants were urged to spread the word through social media outlets such as Facebook, Twitter and the like.  Myself and the other early contestants were quite diligent in doing just that – so much so that my image was the 2nd favorite of the social media voters.  As the March deadline became closer, the contest officials then changed the deadline date to August 1st.  At the time, I was annoyed, but continued to promote my entry.  As the weeks and months have dragged on, my image dropped among the favorites down to 16th as I had pretty much tapped out all my contacts through social media outlets.  But I continued to try to get new followers to vote for my entry.  So today, as I was getting excited for the final push to get a few more votes before Tuesday’s deadline, I went to the contest site and noticed that the officials have once again extended the deadline – now it’s open through October 31st.  To say I am annoyed is an understatement and I can’t help but question many things:

(1) Do they not have the money needed for the winner(s) and is that why they are extending the deadline over and over again?

(2) Is this actually a scam just to take peoples’ entry fee?

(3) Are they harvesting names/email addresses, etc. with ulterior motives in mind?

(4) Is the contest rigged so that the winner is someone the officials want and they are giving more time for that entrant to collect votes?

(5) Are the contest officials receiving requests to extend the deadline so that a potential contestant can get their entry in?

(6) And why are entrants not getting notified that the deadline has changed?

So this morning, while reviewing my entry status, I noticed my entry had dropped down more and that the deadline was changed, which then prompted me to take a closer look at the contest rules.  I had originally glanced these over before entering just to see what the deadline date was, the image categories, entry fee, etc. but had not really made a mental note of most of the legalese.  So when I got to the bottom of the rules, I noticed #28 which states, “The Organizer reserves the right to make modifications to the Rules/Terms of Service. Changes made to the Rules/Terms will be posted on the website in this section or notification will be sent to users by email. Continued use of the website constitutes acceptance of those changes.”  Great.  🙁  So the officials have given themselves a way to change the contest deadline date basically as often and as long as they would like.  But yet they have failed to send notification by email to the users (meaning people like me and I imagine all registered voters) and apparently that is okay because their Rule #28 says “OR notification will be sent”.  I’ve checked my spam filter too and don’t recall ever getting notification to the terms of the contest.  Regardless, even if they did notify me by email, I would still be pissed off about it. Why even put that in the rules if you are only going to change the rules on that web page and not bother to notify contestants?

After all of this, I’m left with this decision:  (a) pull my entry out of the competition, (b) leave the entry intact, but stop promoting it, or (c) leave the entry intact, but continue to still seek votes.  For now, I’m leaving it and asking for more votes.  But I have to say that I wouldn’t recommend anyone else spend their money to enter their own image(s) into the contest.  For all we know, the contest may never end…they may continue to collect registrant’s contact info and take entry fees without ever intending to finalize the contest and select a winner.

The whole thing just leaves a bitter taste in my mouth.


Button-Portfolio  Button-FB-Fans  Button-Twitter  Button-BookSession


Posted in Photography - General | Tagged , , , | 2 Comments

Project 52, Weeks 29 & 30 {Personal Photography Project}

Got behind in posting my Project 52 images again.  Sorry about that.  These are from last week and this week.  The theme for Week 29 was "Shape".  I thought the swirly shape that was made by the watergun was pretty cool.  For those interested in camera settings, I shot this handheld using my Canon 70-200L at 200mm, ISO 400, 1/125 at F4.

KimHill_Project52_Wk29-Shape_Blog

This week's theme is "Friends".  On Sunday, we went bowling with some of the boys' friends. It was great fun!  Unfortunately, I had forgotten to grab a CF card and was stuck using my husband's phone to snag a few photos.  I'm less than thrilled with the functionality of a phone camera, and the quality sucks even more.  But it is what it is.  So I have no idea on settings for this other than it was shot at medium size and the flash fired.  LOL

KimHill_Project52_Wk30-Friends_Blog

Are you doing your own Project 52 or Project 365/66?  If so, please post a link to your images in the comments below.   🙂

Button-Portfolio  Button-FB-Fans  Button-Twitter  Button-BookSession


Posted in Photography - General, Project 52 | Tagged , , , , , | 9 Comments

Project 52, Week 28 {Personal Photography Project}

Last week's theme was "Light".  Since the 4th of July holiday was this week, I knew that I'd be taking photos of the fireworks on Saturday so that's why I'm late in posting.  Every year, my sister and BIL put on quite a show and this year's was pretty awesome.  The kids used the ultra long sparklers while we waited for dusk to arrive.  And then the show began.  I had a heck of a time getting shots of the fireworks…my camera does not like to focus in the dark so I set it on "infinity" and hoped for the best.  I had to experiment quite a bit with the exposure and finally got a few decent looking shots right near the end of the show.

For those interested in camera settings, I shot this handheld using my Canon 24-70L at 25mm, ISO 400, 1/20 at F2.8.

KimHill_Project52_Wk28-Light_Blog

Are you doing your own Project 52 or Project 365/66?  If so, please post a link to your images in the comments below.   🙂

Button-Portfolio  Button-FB-Fans  Button-Twitter  Button-BookSession


Posted in Photography - General, Project 52 | Tagged , , , , , , , , | 8 Comments

Project 52, Week 27 {Personal Photography Project}

This week's theme is "Multiplicity".  As you may know, we have 4 acres and with it comes a variety of wild life.  Last night, while making supper, I noticed this bunny rabbit sitting near the veggie garden.  I was able to snag one still shot of him before he realized I was there and took off toward the swamp.  This is a series of 4 images composited together. 

For those interested in camera settings, I shot this handheld using my Canon 70-200L at 200mm, ISO 320, 1/800 at F2.8.

KimHill_Project52_Wk27-Multiplicity-Blog

And here's the cutie before he started to run.
KMH-9917-Web

Are you doing your own Project 52 or Project 365/66?  If so, please post a link to your images in the comments below.   🙂

Button-Portfolio  Button-FB-Fans  Button-Twitter  Button-BookSession


Posted in Photography - General, Project 52 | Tagged , , , , , , , | 9 Comments